

Have you ever pulled up a chair to a mouthwatering outdoor meal, only to realize that you are on the menu? Personally, I prefer to eat my shish kabobs without becoming a mosquito snack.
If you feel the same way, these citronella candles are a safe, non-toxic way to repel mosquitos and other flying insects. They’re adapted from my homemade beeswax candle tutorial and super simple to make, but if you don’t want to DIY you can find a handmade option for purchase here that burns for 40 hours.
Does citronella oil really repel insects?
Derived from a cousin of lemongrass, citronella essential oil is distilled from the leaves and stems of the Cymbopogon plant.
According to the Environmental Protection Agency, “Oil of citronella has been in continuous use as an insect repellent with human applications for almost 50 years without any adverse incidents being reported to the EPA.”
However, recent studies suggest that another oil – oil of lemon eucalyptus – may work even better. (1) Since essential oils often have a synergistic effect, I blend both together in my recipe.
How To Make Citronella Candles
Equipment
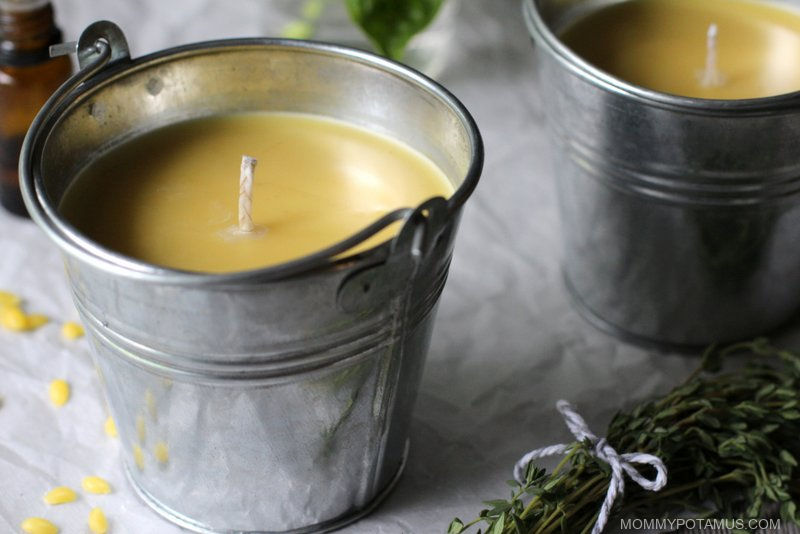
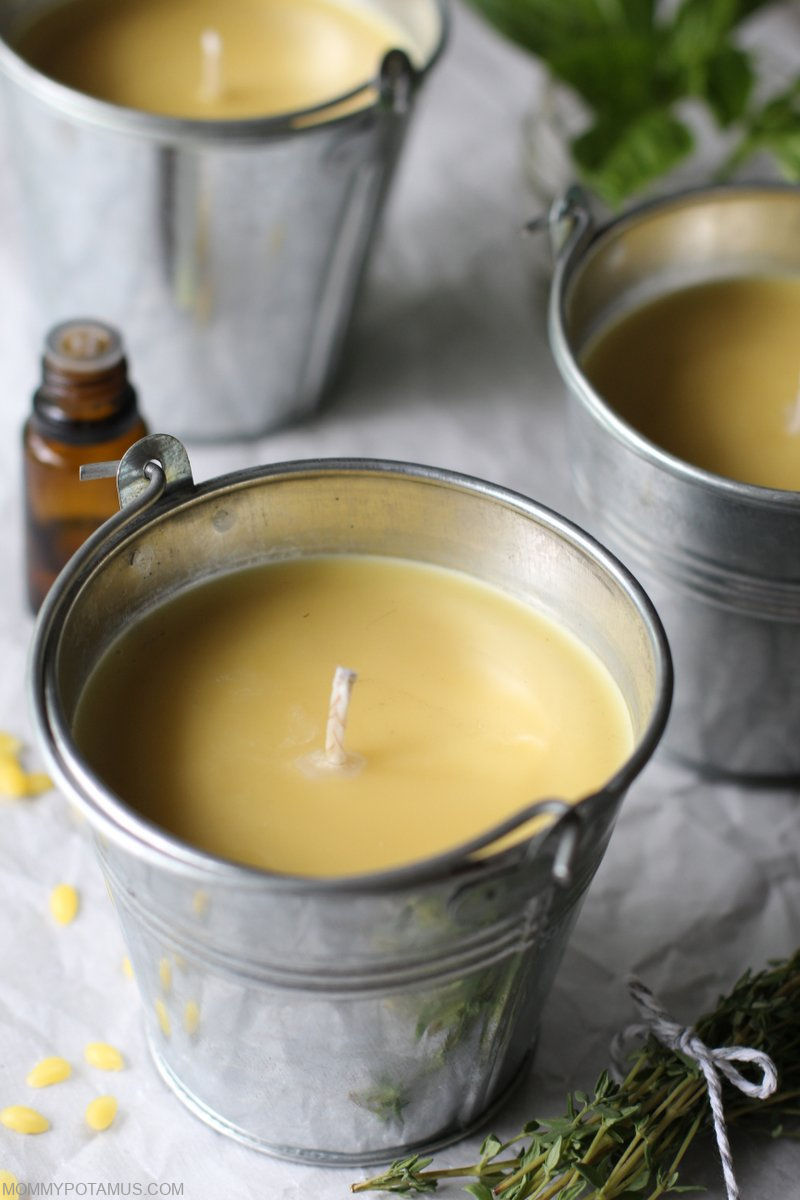
This recipe will make two 12 ounce candles (the size of the buckets I used in the above photos) or three 8 ounce candles (the size of a half-pint mason jar).
-
- 1 pound filtered beeswax (If you’re using raw, unfiltered beeswax, here’s how to filter it.)
- 1/2 cup coconut oil, melted
- 1 1/2 teaspoons to 1 (1/4 – 1/2 ounce) citronella essential oil
- 1 1/2 teaspoons to 1 (1/4 – 1/2 ounce) essential oil of lemon eucalyptus
- Large cotton wicks with wick tabs attached for 12 ounce candles, or medium wicks for 8 ounce candles*
- Wick stickers
- Two 12 ounce candles (the size of the buckets I used in the above photos) or three 8 ounce candles (the size of a half-pint mason jar)
* These are the best pre-tabbed (anchored) natural option I’ve found. They are dipped in a little soy wax to make the wicks stiff and easy to work with, which I don’t love simply because I try not to buy soy products. For me that’s just a matter of not wanting to support monoculture crops, but in this instance I don’t think there’s actually any health concern associated with using it. I’ve written the manufacturer and thanked them for working hard to create a quality wick, and I’ve asked them to consider offering a wick dipped in beeswax as well.)
A note on wick size: Beeswax properties can vary a lot depending on when and where it was harvested. I’ve suggested a size based on what’s worked for me, but you may find that a larger or smaller wick works better for you.

Step 1: Prepare your candle jars
The wicks I recommend come with a metal tab attached to the bottom. The tabs keep the wicks from floating as the candle wax melts. Attach one of the stickers to the bottom of the wick tab and then place the wick in the center of your container.


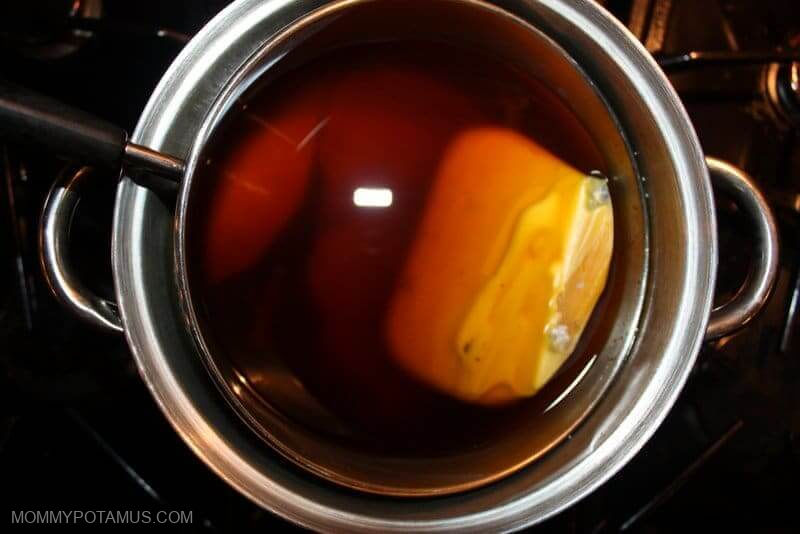
Step 2: Melt beeswax and coconut oil in a double boiler
In a double boiler (or large pot of simmering water with a stainless steel bowl or smaller pot resting inside), gently melt the beeswax and coconut oil over low heat.
Step 3: Add citronella
Once the wax is fully melted, remove it from heat and stir in the citronella. Move quickly to the next step – the wax begins to harden as soon as it cools.
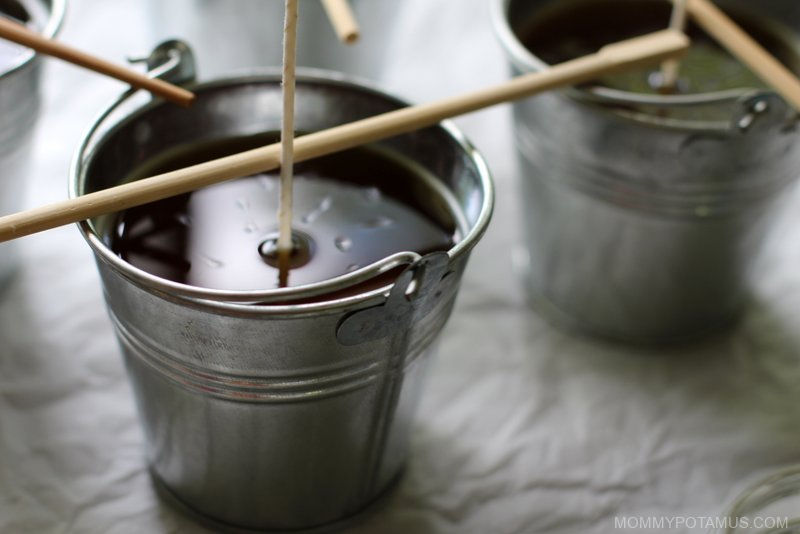
Step 4: Pour beeswax mixture
Pour the wax in and check the position of the wick to make sure it is still centered.

Step 5: Set the wick
Use a pencil or chopstick to prop the wick up in the center. My wicks are dipped in wax so they stand up well with just a little support. If you’re using wicks that are not dipped, you may need to tape them to the pencil/chopstick to keep them in place.
Step 6: Allow candles to set
Sometimes if candles cool too quickly they tend to crack down the center. With the galvanized buckets I used for this set that wasn’t an issue at all. However, if you find that your candles do crack while cooling, you can heat your oven to 300F, place them inside and then turn off the oven. The candles will melt just enough to fill in the crack – all you need to do is leave them in there until they’ve completely cooled.
Step 7: Trim wick
Allow your candles to harden for 24 hours, then trim the wick to about 1/4 inch. Allow to cure for another 24 hours before using. When lighting your candle, direct the flame at the base of the wick so that some of wax melts and is drawn up into the wick – this helps it burn properly. Allow candle to burn long enough so the wax melts out to the side of the jar. This helps to prevent tunneling (when the middle melts down with lots of wax left over around the edges). Never leave a candle unattended.
Cleaning Tip: Place any oven proof containers in a warm oven to melt wax that has dried on the sides. Once the wax is melted, wipe it out with a paper towel or old newspaper.
Frequently Asked Questions
Can I make these candles with a triple wick?
It’s possible if you use a wider container that holds 24 ounces and double the amount of beeswax, coconut oil and citronella oil you use. However, I’d definitely recommend the medium wicks instead of the large ones if you are going to have more than one.
Is there another wax I can use?
I haven’t tested it but candelilla wax might work. It has a similar melting point to beeswax.
I don’t want to make my own. Where can I buy them?
These handmade citronella candles burn for 40 hours.
How many candles do you recommend for a small backyard and how far about should I spread them to keep mosquitoes at bay.
It depends on a lot of factors. If it’s a windy day you’ll likely need more, and if there aren’t many critters out you’ll likely need less.
Can you substitute other oils for the citronella for other scents?
natural insect repellent/bug spray
Are these safe to burn near children?
Unlike true eucalyptus, which contains high amounts of 1.8 cineole that can cause breathing problems in children, both citronella and lemon eucalyptus are considered safe for children.
Article Sources:
1. Marta, Ferreira Maia and Moore, Sarah J. Plant-based insect repellents: a review of their efficacy, development and testing. Retrieved from http://bit.ly/2zr0ANo
Continue reading How To Make Citronella Candles...
from Mommypotamus http://bit.ly/2UDr6NK


No comments: